You can organize your research notes (and items created using the Capture toolbar in desktop versions of MindView) in folders. You can also add sources to your items to document the origin of the information they contain.
![]() Do one of the following:
Do one of the following:
 From
the app home screen, open the settings menu, tap Folders
From
the app home screen, open the settings menu, tap Folders
![]() , and tap the plus sign
, and tap the plus sign ![]() .
.
When
creating a research note or editing a note or Capture toolbar item, tap
Add Folder ![]() .
.
![]() Enter a title and (optionally)
a description for the folder, and tap the checkmark
Enter a title and (optionally)
a description for the folder, and tap the checkmark ![]() .
.
If you created the new folder while creating or editing an item, the item is automatically placed in the new folder. You can use folders to filter your research notes in MindView Assist as explained under "Filtering items" in "Navigating and setting up the app".
![]() From the app home screen,
open the settings menu, and tap Folders
From the app home screen,
open the settings menu, and tap Folders
![]() .
.
All folders on the device are shown. For each folder, the number of notes in the folder (if any) is also displayed.
![]() To select an existing
folder for a note that you are creating or editing, tap Select
Existing
To select an existing
folder for a note that you are creating or editing, tap Select
Existing ![]() under
Folder, and tap the name of the
folder.
under
Folder, and tap the name of the
folder.
If you create new research notes while viewing a specific folder as explained under "Viewing items in a specific folder" in "Navigating and setting up the app", the new notes are automatically placed in this folder.
![]() Do one of the following:
Do one of the following:
From
the app home screen, open the settings menu, tap Folders
![]() , and tap the name of the folder you want to edit.
, and tap the name of the folder you want to edit.
If
you are creating or editing an item and have not assigned it to a folder
yet, tap Select Existing ![]() , and tap the pen button
, and tap the pen button ![]() .
.
![]() Edit the folder title
and/or description, and tap the checkmark
Edit the folder title
and/or description, and tap the checkmark ![]() .
.
![]() When creating or editing
an item, tap Remove
When creating or editing
an item, tap Remove ![]() next to the folder name
to remove the item from the folder. The folder itself is not deleted.
next to the folder name
to remove the item from the folder. The folder itself is not deleted.
![]() Do one of the following:
Do one of the following:
From
the app home screen, open the settings menu, tap Folders
![]() , and tap Delete
, and tap Delete
![]() next to the name of the folder you want to remove.
next to the name of the folder you want to remove.
If
you are creating or editing an item and have not assigned it to a folder
yet, tap Select Existing ![]() , and tap Delete
, and tap Delete
![]() next to the name of the folder you want to remove.
next to the name of the folder you want to remove.
The folder is deleted. Notes in the folder (if any) are not deleted.
![]() Do one of the following:
Do one of the following:
From
the app home screen, open the settings menu, tap Sources
![]() , and tap the plus sign
, and tap the plus sign ![]() .
.
When
creating or editing an item, tap Add
Source ![]() .
.
![]() Create a new source by
doing one of the following:
Create a new source by
doing one of the following:
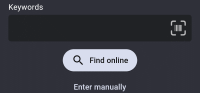
Search
for a source online by entering one or more search terms, tapping Find online and selecting a source
from the list of results.
Add
a book source by tapping the barcode ![]() button and scanning
the barcode on the back of the book to get its ISBN or other identification
number.
button and scanning
the barcode on the back of the book to get its ISBN or other identification
number.
Tap
Enter manually to manually enter
source details.
![]() On the subsequent screen,
enter or review source information as needed.
On the subsequent screen,
enter or review source information as needed.
You can enter or edit information such as type, title and authors. The fields available depend on the source type chosen.
![]() Tap the checkmark
Tap the checkmark ![]() .
.
The source is created. If you created the new source while creating or editing an item, the source is automatically added to the item.
![]() From the app home screen,
open the settings menu, and tap Sources
From the app home screen,
open the settings menu, and tap Sources
![]() .
.
All sources on the device are shown. For each source, the number of references to that source (if any) in the items is also displayed.
![]() To select an existing
source when creating or editing an item, tap Select
Existing
To select an existing
source when creating or editing an item, tap Select
Existing ![]() under
Source, and tap the name of the
source.
under
Source, and tap the name of the
source.
![]() Do one of the following:
Do one of the following:
From
the app home screen, open the settings menu, tap Sources
![]() , and tap the name of the source
you want to edit.
, and tap the name of the source
you want to edit.
If
you are creating or editing an item and have not added a source to it
yet, tap Select Existing ![]() , and tap the pen button
, and tap the pen button ![]() next to the source you
want to edit.
next to the source you
want to edit.
![]() Edit the source by updating
the fields as required, and tap the checkmark
Edit the source by updating
the fields as required, and tap the checkmark ![]() .
.
![]() When creating or editing
an item, tap Remove
When creating or editing
an item, tap Remove ![]() next to the source name
to remove the source from the item. The source itself is not deleted.
next to the source name
to remove the source from the item. The source itself is not deleted.
![]() Do one of the following:
Do one of the following:
From
the app home screen, open the settings menu, tap Sources
![]() , and tap Delete
, and tap Delete
![]() next to the name of the source you want to remove.
next to the name of the source you want to remove.
If
you are creating or editing an item and have not added a source to it
yet, tap Select Existing ![]() , and tap Delete
, and tap Delete
![]() next to the name of the source you want to remove.
next to the name of the source you want to remove.
The source is deleted. Items that referenced the source (if any) are not deleted.
Folder and source information is synchronized to your MindView account along with other note information. You can therefore use folders and sources in MindView Online and desktop versions of MindView:
You can filter items
by folder in the Research panel in MindView Online as explained under
"Research
panel options" in "Inserting
items from the Research panel". You can also do this in desktop
versions of MindView; for more information, see the documentation for
your desktop version of MindView.
Sources in your research
notes are added to the list of sources in your MindView Online and MindView
documents when you insert the notes in your mind maps. For more information
on using sources in MindView Online, see "Using
bibliography sources". For more information on using sources
in desktop versions of MindView, see the documentation for your desktop
version of MindView.